Feature:
Augmented Reality

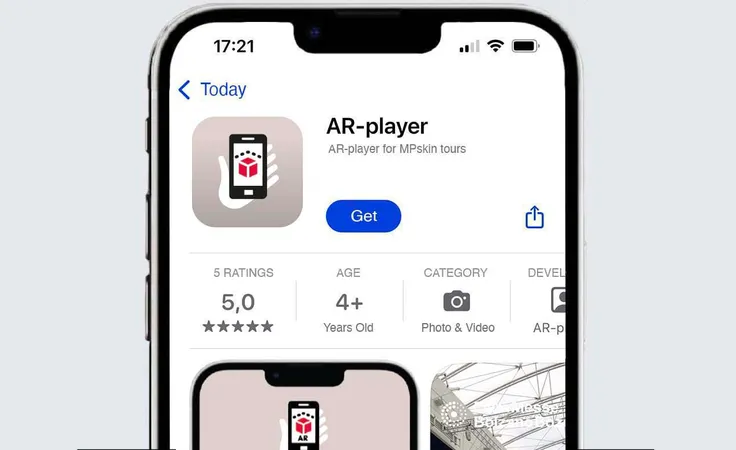
Discover the next level of immersive experience with AR-Player®, the augmented reality player that brings real places to life with the help of Matterport scans!


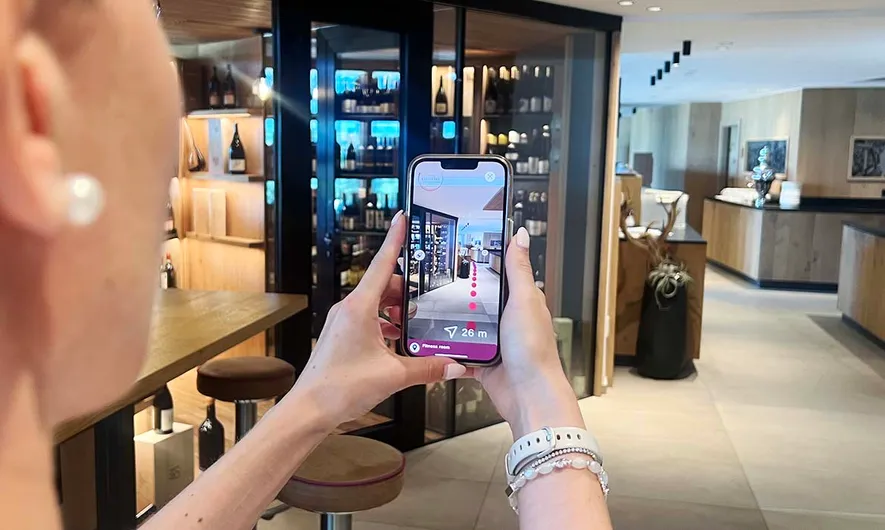
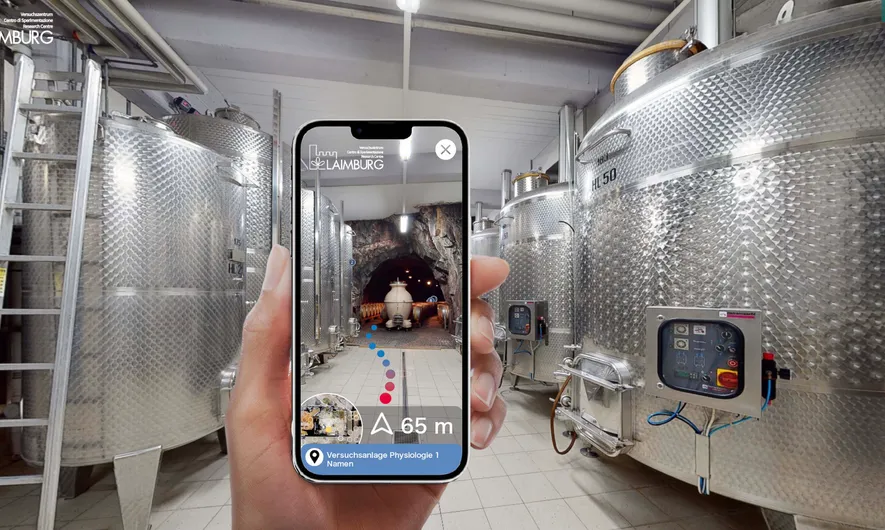
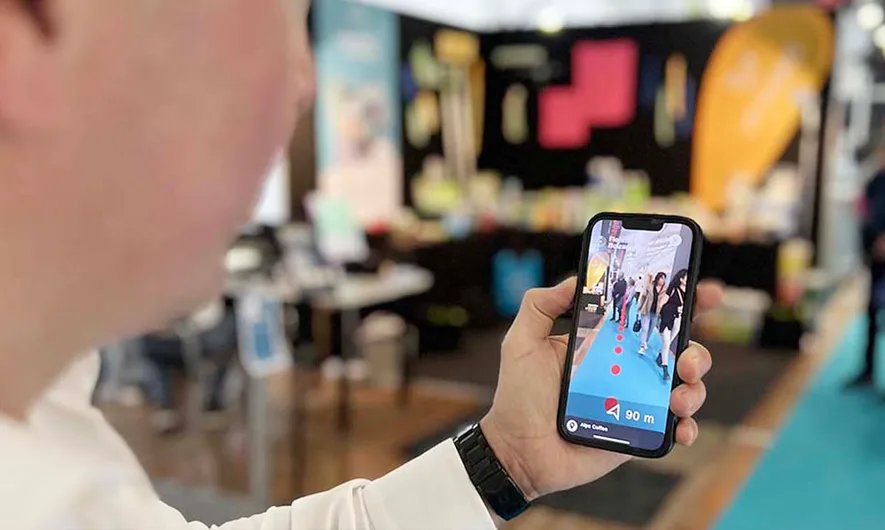
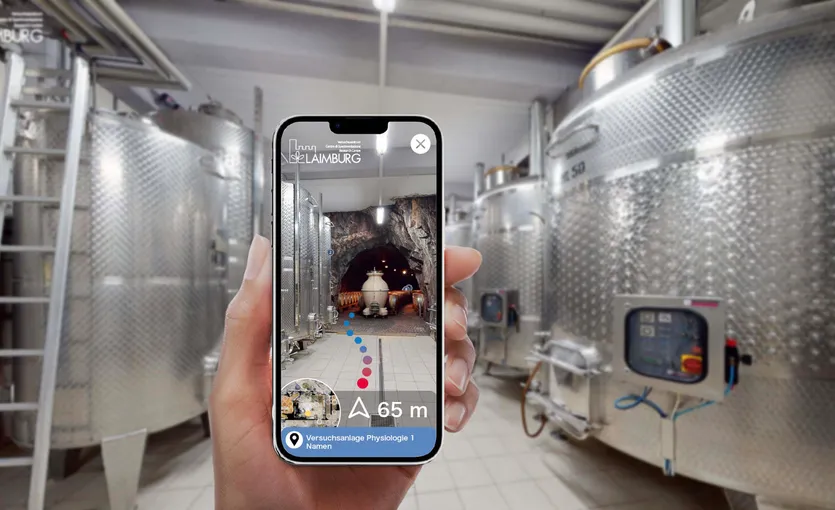
With the MPskin AR-Player®, your virtual tours can now also be used on site as an interactive augmented reality experience. 
Whether for facility management, as an AR guide for museums, for Industry 4.0 or as a unique AR game.
But that's not all, another fantastic feature awaits you: the Indoor Wayfinder!
 

Start your trial now and impress your clients with the different possible use cases!

Use Case Examples

Museums

AR is almost predestined for museums! With AR, visitors no longer need audio guide devices, all types of content are multilingual and can be remotely updated at any time.
Furthermore, with just one AR activation, any number of different tour versions can be created: one for adults, one for children, one for didactics and more.

Hospitality

Indoor navigation can also be helpful in large hotels or resorts; guests can be guided to any area of the facility by using the Wayfinder.
AR can also provide exciting entertainment for younger guests by incorporating mini-games into the tour - for example, delight children with an Easter egg hunt or other search games!

Churches

Bring church visitors closer to the art and cultural treasures and provide valuable information - in Tags, via Virtual Staging and directly in the Menu!
The QR code of the AR tour can, for example, be printed on postcards that visitors can purchase, which helps generating additional revenue with AR.

Trade Fairs

Never lose valuable time searching for exhibition booths again! The AR Wayfinder makes it easier for visitors to search for and find relevant exhibitiors. 
In addition, advertising partners can also be presented in the tour - just implement a digital advertising space through Virtual Staging! AR offers an innovative, virtual advertising platform.

The Indoor Wayfinder

With our innovative AR Wayfinder feature, visitors can be guided directly to any desired position or information point (Tag) on site and navigate effortlessly through indoor and outdoor areas. 


By integrating tags or regular submenu deep links in the menu, users can easily be guided to the selected destination.

Indoor Navigation for Buildings


With our integrated Wayfinder, users can be guided to any point of their choice on site. The navigation can be started by clicking on the tags/infopoints or deep links built into the menu. 

The Augmented Museum Guide


Experience museums like never before: any content previously inserted in MPskin can be displayed in AR!
Audio guides, info points and even virtual staging elements such as 3D avatars or figures turn a visit to the museum into a unique experience.
As several tour versions can be created with just one AR activation, a separate children's tour can also be created, for example.

All of this can of course be set up for multiple languages.

Use for Trade Fairs


With the Wayfinder, visitors can quickly and easily find the exhibitor they are looking for at large trade fairs.

AR also enables the use of empty spaces for digital advertising! Images, videos or 3D objects can enhance the booths of different exhibitors and be used as a digital advertising platform.

Computer Aided Facility Management (CAFM)


AR can be used to shorten the search for sensors, fire extinguishers and other relevant objects, making it easier to monitor large buildings.
In addition, useful information could be integrated into info points, PDFs or videos in the tour and opened directly in AR. 

Augmented reality as a new
digital advertising platform!

What is the AR-player®?

The AR-player app by MPskin allows you to experience all the content of a digital twin inserted into MPskin in its physical environment, i.e. on site, in AR. Visitors to the respective location only need to install our AR-Player® app and scan the QR code of the tour on site!

Our AR-player® is easy to use and can be downloaded for free in the iOS App Store and the Google Play Store.

How to Activate your AR-Experience

Step 1 – Preparation:

Scan your space with Matterport and insert any content you like with MPskin.


Tip:
For the best positioning of tags and digital content, we recommend using tours scanned with the Pro3 camera.

Step 2 – Purchasing the MatterPak

Purchase the MatterPak of the respective Space in your Matterport backend. 
After a few minutes or one hours of waiting, the MatterPak will be ready!

Step 3 – Activating your AR-Tour

Log in to your MPskin backend, navigate to “New” in the AR tab and select the Matterport Space for which you have purchased the MatterPak.


The pricing will based on tour size and the maximum number of monthly AR visitors.


Next, give the AR tour an “internal title” and then wait until the status changes from “waiting” to “ready”. This can take 1 - 24 hours, depending on the size of the Matterport tour.

Step 4 – Download AR-QR-Code and position it on Site

As soon as the AR tour status shows “ready”, ALL your MPskin tours with this Matterport Space ID can be used in AR. This means that you can also create different AR versions with just one AR activation, for example different mini-games.


To do this, simply go to the “Share” tab in your MPskin Tour, where you will now find the share links and QR codes for the AR version. The QR codes can be placed on site by your customers so that visitors can scan them and start the AR tour.


>> We recommend positioning the QR code at an easily recognizable, prominent starting point so that the position can be identified reliably and quickly.

Step 5 – Ready to go!

Visitors now only have to scan the QR code on site, after which they will be asked to install our AR-player® app.


The AR-player® app can then be opened and the QR code scanned. Visitors should then briefly swivel their mobile device back and forth so that the positioning is correctly recognized - and the AR tour starts!

AR Media Kit

In order for you to promote AR, you can download the official logos, photos and videos here:


Download AR Images


Download AR Videos


Download AR-Player Logo


Download MPskin Logo

AR – Guide

Creation of AR-Tours

The general guide on how to set up your AR-Tour can be found above.

Please note that currently, only the MPskin account owner can create new AR-Tours!
Once the Tour has been created, sub-users can access the AR-Tab and the AR-QR-Codes.

After the creation of the AR-Tour, the „State“ column will display the current state of the project.
At the start, it will indicate „mp-start“. When the state shows „ready“, the AR-Tour is ready for use!

Other states you may see in between those two mentioned above include:
„Matterpak download started/done"“, „Cloud upload started/done“, „Awaiting generation“, „Generation in progress“ and „Finalization in progress“. These states do not indicate any issue with the project.

Error codes will display as „cloud-error“ or „mp-error“.
We will get notified of these errors and fix them accordingly, you do not need to contact us in these cases.

Scanning the QR-Codes

The QR-Code, once positioned on-site, can either be scanned directly in the standard phone camera or in the AR-player app.
If a user does not yet have the AR-player app installed, they will be led to the app/play store to download the AR-player app. After successfully downloading it, the QR-Code can be scanned again.
If the AR-player app is already installed, it will go directly to opening the AR-tour.

If the AR-player loses connection while being used on-site, users will see the “swing left and right to locate” message again.

In future updates, we will be implementing a “Tour Library” that allows users to save previously scanned AR-Tours, removing the need to re-scan QR-Codes if the app is started while users are not near any QR-Code.

QR-Codes

Under “Share < AR url” you will find several QR-Codes for your AR-tour, as well as standard URL links.
The URL links can be used to create your own custom QR code, for example if your client would like a custom design that includes a logo.

The standard QR-codes can be found below – there will be one QR code shown for every selected language, as well as one general QR-code that lets users select their language of choice in the AR-player app.

Under “QR-Codes with Start Position”, you can generate QR-Codes that contain information on the location of the QR-Code. You can click any of the sweep points in the tour to generate the corresponding QR-Code. This QR-Code will recognize any starting position within 5-6 meters of the selected sweep point, so it does not have to be scanned at the exact location of the sweep point.

We recommend using these QR-Codes instead of the general QR-Codes, because they help decrease the time it takes for the AR-player to recognize the starting position of the tour.
This is particularly useful for large spaces! With the general QR-Code, the larger the space, the longer it will take the AR-player to recognize the location the QR-Code has been scanned at.

Wayfinder

In general, our Wayfinder is based on the Mesh (the 3D-Data) of the tour. The Wayfinder always takes the shortest route to the chosen destination, based on the available Mesh in the Tour. It can be triggered by clicking on a Tag or Deeplink in the Menu, or by clicking a Deeplink in a Tag.
The Menu can be opened by clicking on the Symbol at the top right of every AR-Tour (Burger-Menu).

Errors in the Wayfinding path may occur if there are holes or gaps in the Mesh – for best results, make sure that you have sufficient scan points in your tour. Keep in mind that the mesh of tours created with the Pro3 camera is superior to tours created with a Pro2 or other cameras. Cameras that use LIDAR-laser provide the best 3D data.

Depending on the layout of the space, the Wayfinder might have issues maintaining navigation over several floors. We recommend placing QR-Codes, ideally with the Starting Position, on each floor, in case the Wayfinding is lost.
The Wayfinder is currently unable to recognize elevators as a navigable path, we recommend placing QR-Codes next to the elevator on the different floors.

By making use of our AR-Editor, you can block certain areas of the tour for the Wayfinder, more information on this below!

AR-Editor

Once a skin has been activated for AR, you will be able to access the AR-tab in the skin.

In there, you will find the AR-Editor. The AR-Editor allows you to place blockades in the tour, the Wayfinder will not navigate wherever blockades are placed. This allows you to either block entire areas or create a predetermined path for the Wayfinder.

The AR-Blockers can also be used to “fix” certain issues the Wayfinder might have.

For example: If there is a gap in the Mesh on a certain floor, the Wayfinder might try and lead users “through the ceiling” – this can be fixed by placing a large, flat AR-Blocker between floors, leaving out a gap where the staircase is.
We recommend placing an AR-Blocker between all floors, as holes in the Mesh are common (especially in larger spaces) and might lead to issues for the Wayfinding.

Later on, we will also be implementing a “Waypointer” that allows you to “enable” certain pathways for the Wayfinder. This will be used, for example, for narrow stairs,  paths or holes in the Mesh that the Wayfinder does not recognize as a walkable path.

Prices

The costs for AR depend on the area of the Matterpak or scanned area. You can also see these under "Internal Details" in the backend.
These start at 0.025 euros per m2 (approx 0.0025/sqft), including 1,000 visits per month. For 2,000 visits, the price is x2 and so on.
Upon activation, you have a 14-day free trial period with 20 visits, so you can test it in advance and demonstrate it to your client. The costs are only incurred after this period has expired.

With this price model, AR is also possible for small spaces!

If you have a very large model (>15,000m2) or need over 10,000 visits, just ask us! Then we will create a personalised offer according to your requirements

Troubleshooting - Preventing Tour Crashes

The largest contributing factor to the crashing of tours is a lack of (available) RAM. In general, iOS devices tend to have less RAM than Android devices. 
In order to improve the stability of the AR tour, there are a few things to keep in mind:

  • When possible, use PNGs instead of SVGs as they require a lot of RAM, especially when there are several SVGs in one tour
  • When possible, use MP4s instead of GIFs - similar to SVGs, GIFs require a lot of RAM
  • When using 3D objects, make sure they are exported in power of twos (512x512, 1024x2048 etc.) and are as compressed as possible
  • The use of AR requires a mobile phone with certain technical specifications. If the device does not have a 3D sensor (for exmple LiDAR, gyroscopes, accelerometers), it cannot use any AR applications.
Future Development/Roadmap

The following list serves as a rough overview of features we have already planned, but not yet implemented. This list might be subject to changes and will be updated over time.

  • AR-Waypointer – manually adding/defining a walkable area for the Wayfinder
  • Icon size settings
  • Support for animated 3D Virtual Staging objects
  • Support for Green Screen Videos/Color Filter 
  • AR Tour Library in the AR-player
  • App-Whitelabeling – customizing the AR-player’s Logo and brand color
  • Multilingual Support for the AR-player app
  • Optimization for Tablets
  • Password Protection for AR-Tours
  • Entry-Popup in AR-Tours
  • Settings for Metric/Imperial

Disclaimer: Please note that our AR feature is currently still in development. We are continuously working on improving the different functionalities it offers. If you encounter any errors that are not listed in this guide, you may contact us under support@mpskin.com

AR tours - what you need to know before getting started

We recommend to only use Pro3 tours for your AR Experiences. SVGs are not yet fully supported, so display problems may occur. Preferably use PNG files instead of SVG files.

The Wayfinder is currently still in the BETA stage, we are constantly working on improving and refining this feature. If you have any problems, please contact support@mpskin.com at any time, your feedback will help us!

Tags: the standard Matterport info points cannot be displayed in AR, therefore all tags are displayed as “popups”.