Feature: 
360° Panoramas

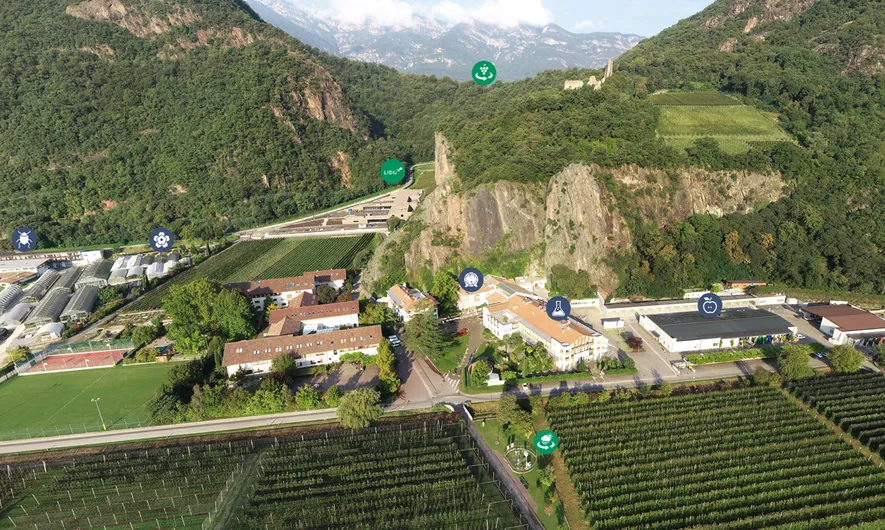
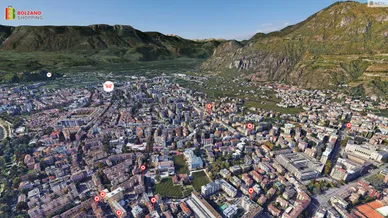
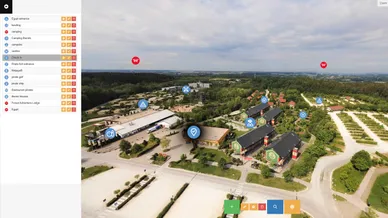
With MPskin's “Panorama” feature, any number of 360° images can be integrated into the tour. 


“Hotspots” can be added to each panorama, allowing you to place click actions of your choice to each Hotspot. This enables, for example, navigation across several panoramas or the linking of one or several skins directly in the panorama.
 

With this method, you can even create simple 360° tours, either as a standalone tour or as an integration for a Matterport tour!

Breathtaking Impressions

With our panorama feature, you can easily add high-resolution 360-degree images to your tour! Images can be up to 10,000 x 5,000 pixels in size. 
Panoramas can be integrated into the tour in different ways: in tags, in the menu, as a sweep action, in the highlight reel or as an entry popup. 

Panorama Hotspots

By adding so-called “hotspots”, any click action can be linked to the panorama, for example further panoramas, audio files, photos, text or external links. With the “external links” option, you can also link other skins in the panorama! This is particularly useful for projects that consist of several skins.
The individual hotspots can of course also be customized with their own icons and colors.

360° Tours

You can also create standalone 360° tours in MPskin! To do this, first upload all the required images in the panorama tab, select the starter panorama as an “entry popup” and connect the different panoramas to each other using hotspots.
A 360° tour like that can also be linked with or added to a skin - for example, to display outdoor areas or more distant areas without the need extra Matterport scans. 

FAQs about
360° Panoramas

How do I start a tour with a panoramic photo?

To do this, you must first upload the panorama and configure it as an “entry popup”.
Then, set the entry popup to “Fullscreen”.

If the starter panorama is to be used in several skins, we recommend creating a standalone panorama tour/360 tour (without Matterport ID) instead and linking it in the various tours as entry popup with the “external link” option. 
Advantage: when the panorama has to be updated, the pano is automatically adjusted in all tours, avoiding having to update each skin individually. In addition, the tour menu is also displayed above the panorama in this way! 

Can normal photos also be uploaded in the Panorama tab?

Unfortunately not. 
Only 360° images can be used for the panorama features (hotspots etc.). When using normal photos, they will be displayed with distortion. 

How many panoramas can be uploaded in one skin?

There is no limit to the number of panoramas you can upload! You can use as many as you like.
Panoramas are also not loaded directly at the start of the tour, so even a larger number of panoramas will not affect the loading time of the tour itself. 

What is the maximum size for panoramas in MPskin?

The maximum permitted size of the panoramas is 10,000 x 5,000 pixels. 
However, a smaller size does mean faster loading times, so a compression to e.g. 8,000 x 4,000 pixels is recommended - especially if several panoramas are used in the skin. 

Where can panoramas be integrated with MPskin?

Panoramas can be integrated virtually anywhere: in tags, in the menu, as a click action on virtual staging objects, as an entry popup or even as a sweep action! 
Drone photos are particularly suitable as entry popups for your tour.

Can panoramas also be configured in several languages?

Of course! As usual with MPskin, panoramas (and their Hotspots) can be configured in all selected languages. 

What cameras can be used to create panoramas?

Panoramic photos can be created with all conventional 360° cameras or with a drone. 
With drones, the panorama mode usually creates individual shots that later have to be stitched together with stitching software (e.g. PanoramaStudio, PTGui or Autopano) to create the overall 360 image.

How can I display the tour menu on top of the panorama?

This is only possible if you create a standalone panorama tour. 
Under “My Skins” you can create a panorama tour with “New 360° Tour”. If you select the starter panorama as “Entry Popup” with the “Fullscreen” option enabled, the menu will be visible above the panorama in the tour. 

Start your creative journey with MPskin!